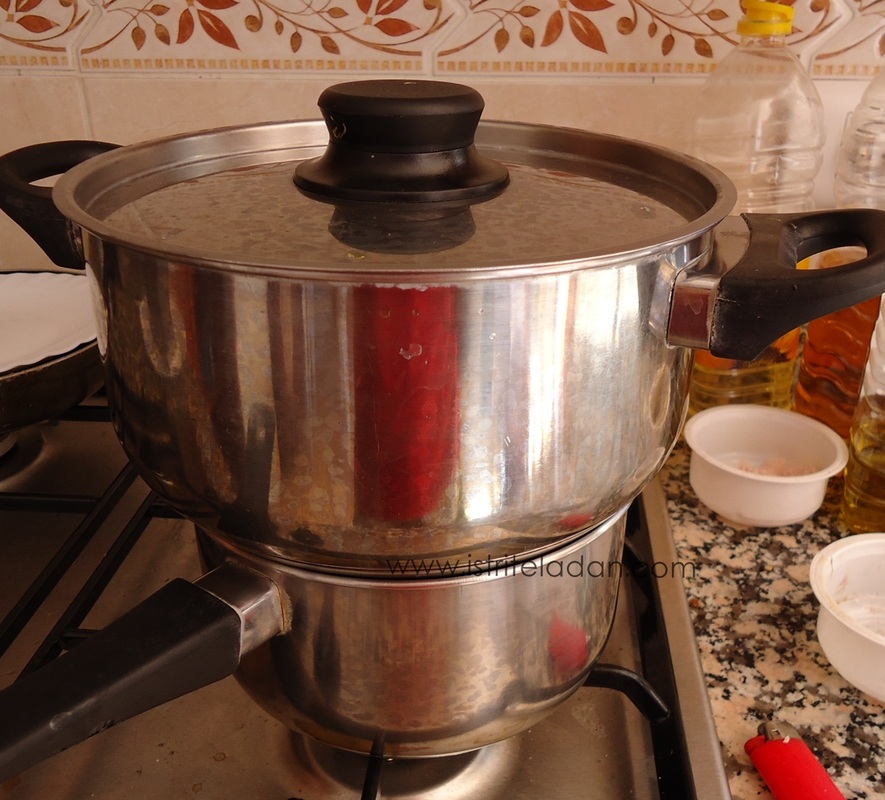
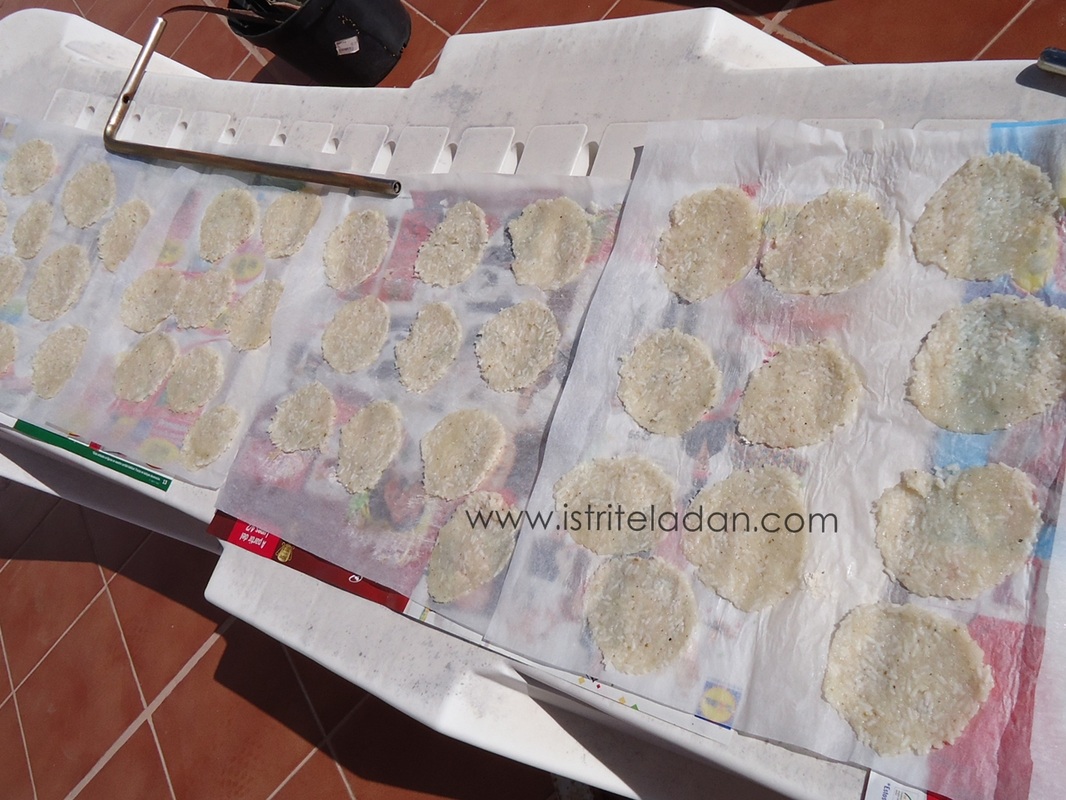
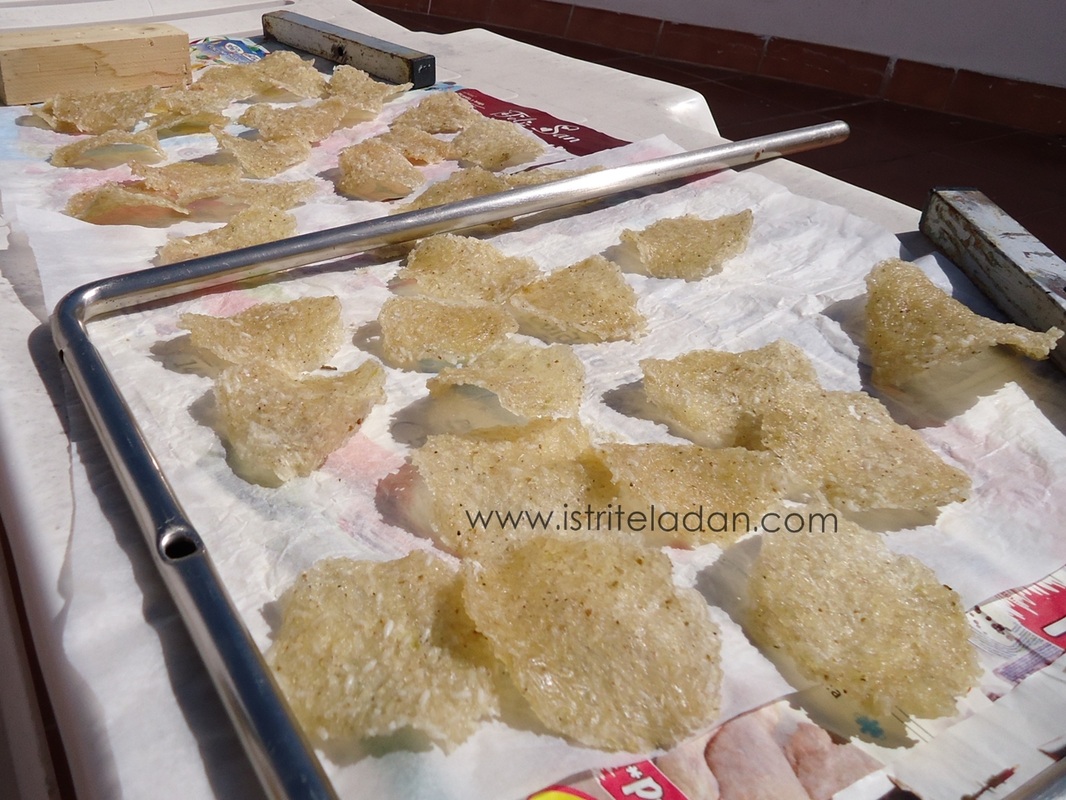
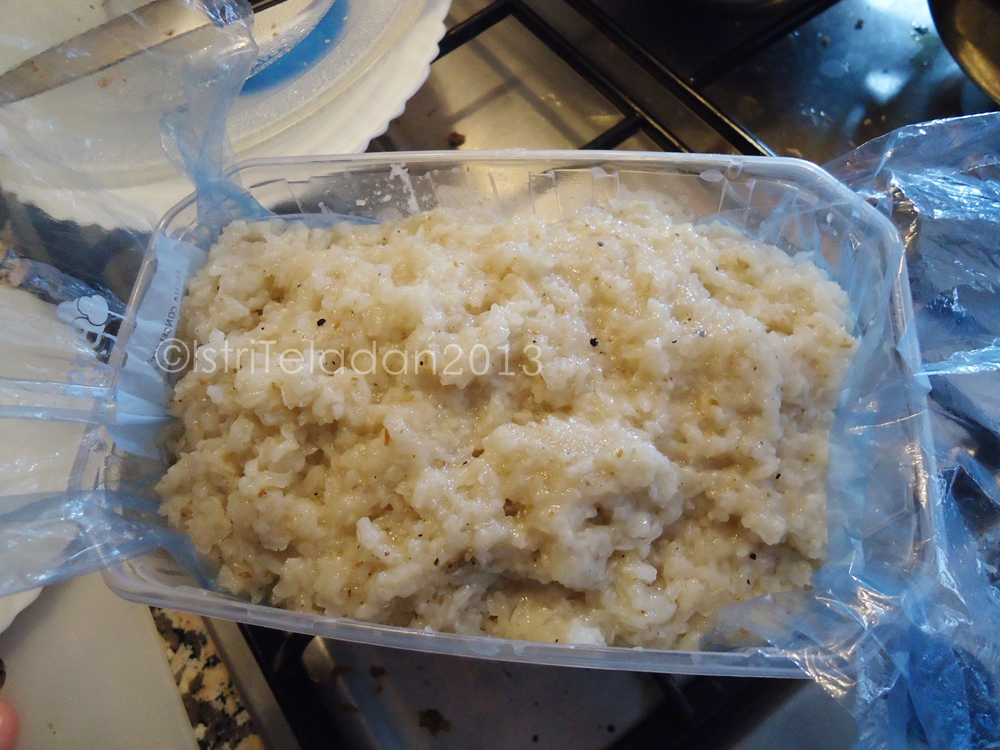
After more than few times attempts on making kerupuk, I could say that I get my degree already on that, so that I'll share you some tips... you may find it usefull later on. Once you let your rice soak overnight inside the pots (use the glutinous rice), you can cook the rice by adding a little more water, the measurement of the water level should be (more or else) 2cm from the rice level. Remember, even if you add too much water, it should be just fine. Add the seasoning at this point. Stir once in a while... cook until rice become porridge. When the water evaporate from the rice, you can see the state of your rice is soft... then it is ready! Let cool room temperature, after that pour the rice dough inside plastic container, where you also lay plastic sheeth underneath, that way it's easy to pull it out when you need to slice the frozen dough. The following morning, or any morning when the sun is shining happily... take out the frozen dough from the freezer. Defrost for an hour, or until you can slice it. Slice thin... lay it on the baking paper... let it dry under the sun.
In my case, I take out the rice dough from the freezer in the night, and put it in the fridge... then leave it overnight. By the time the morning come, your dough is so tender, easy to slice it.
This method of freezing the dough and slice it afterwards is so much practical than try to shape the dough when is fresh and its not frozen. The nature of the dough is sticky,... soo much that stick on your fingers,....argggg...!!
These kerupuk business is made a hit around the relatives here, meaning they like it... the taste of tasty rice with such a crisp texture... and it's homemade!
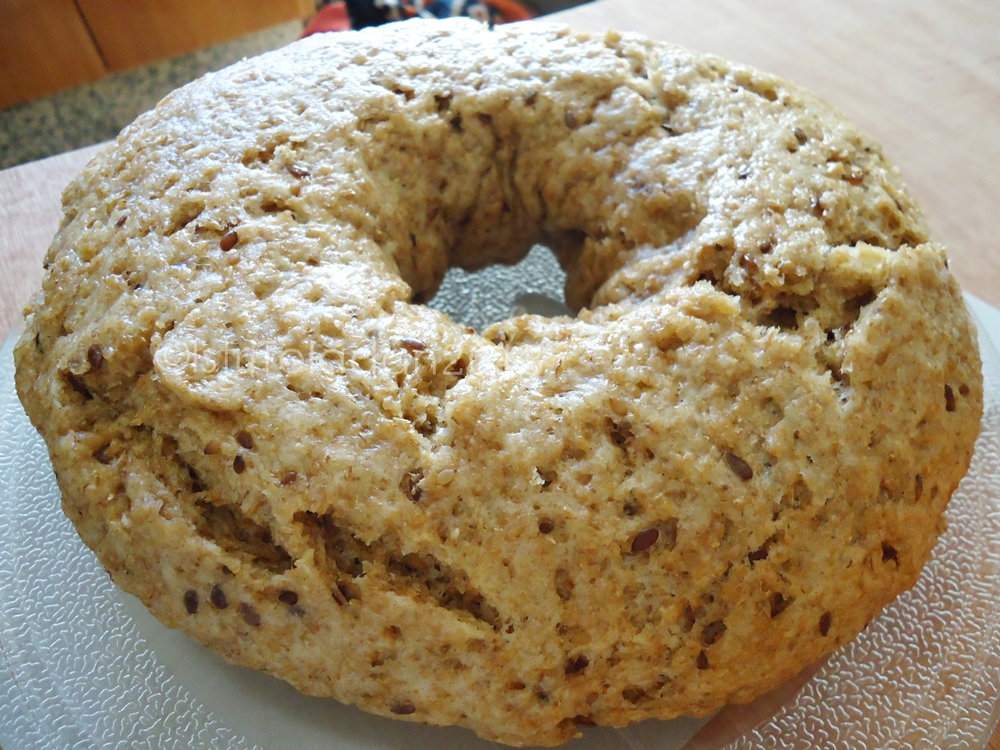
Don't ya feel like having a slice of this plumpy bread?
 I actually feel bad about posting food, coz I ain't a good cook, I admit my limitation in that departement... lol
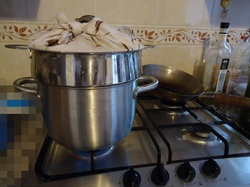
Just want to show you how I bake the bread with the steamer... another way to bake cake or bread without the oven...
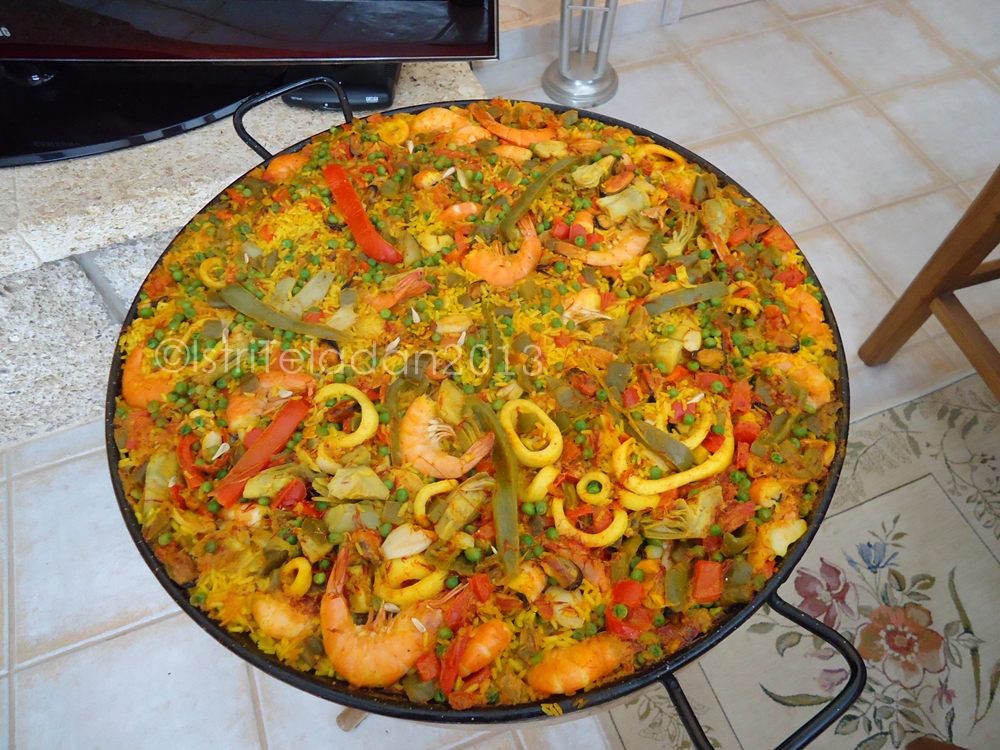
The legendary Paella made by Mr. G and Ms. Mei Mei, our acquaintances. This is the second times we had Paella at their house. Their Paella is outstanding! If you want to know the tips and trick on how to make it then you ask them directly, ok ^^
Yang item itu dari ketan item, nah yg rengginang itu buatan our beloved Ms.Mei Mei yg kehandalannya di dapur uda legendaris ^^
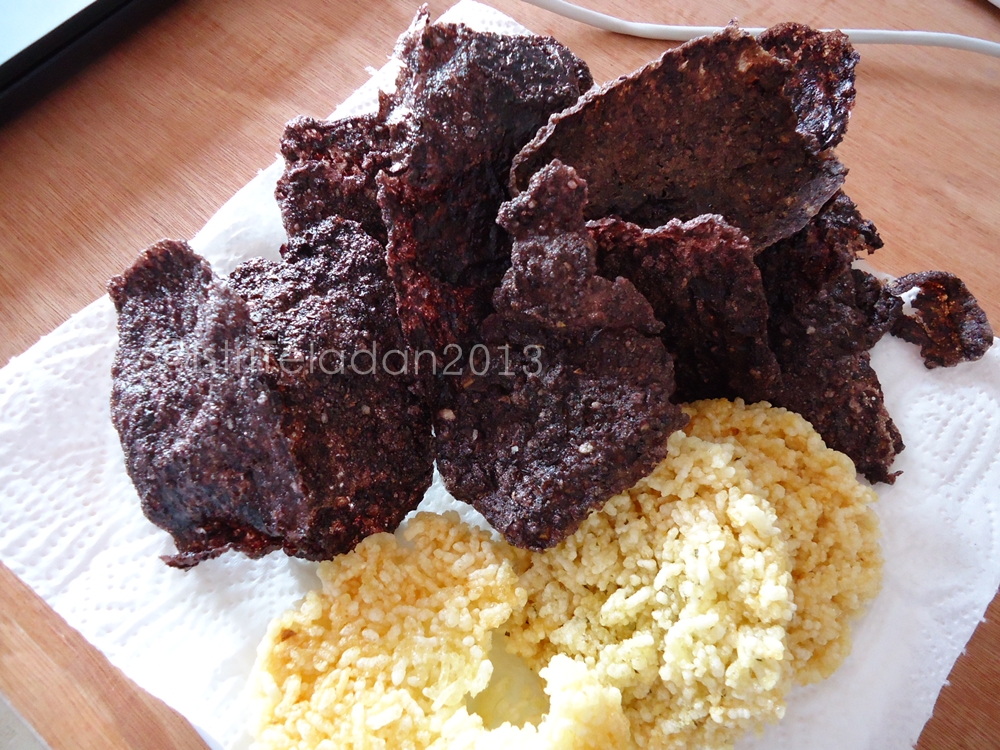
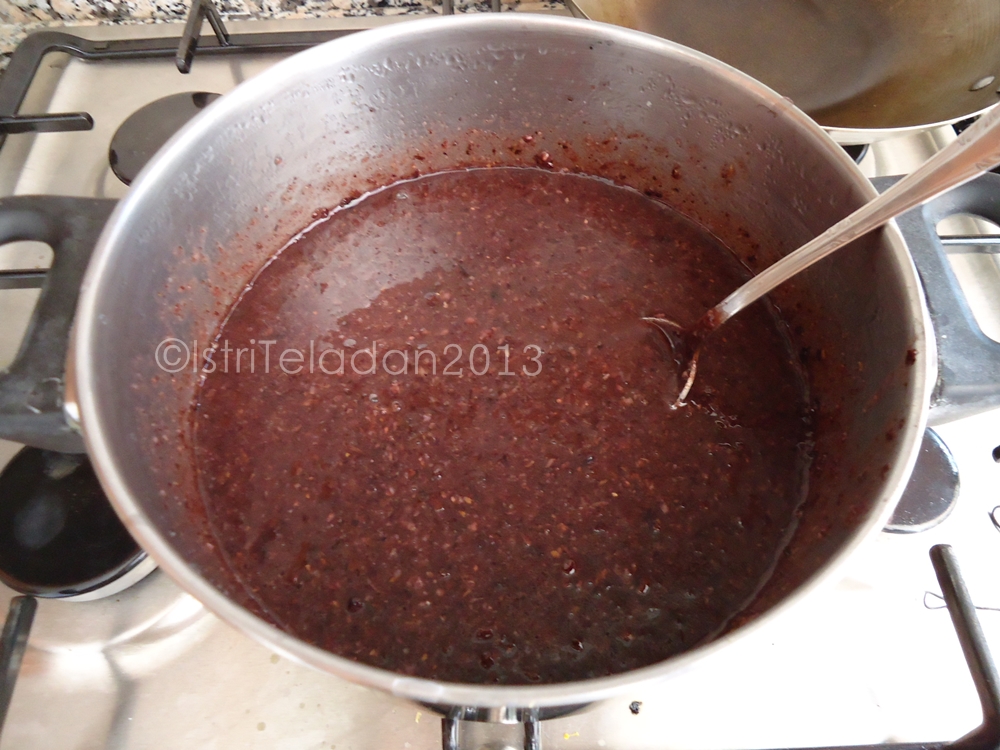
Halo kerupuk lovers, kemaren ga sengaja beli ketan item... karena ga kemakan semua,... jadilah sisanya dibuat kerupuk.
Buatku rasanya ga terlalu nendang, habis kebanyakan air lagi tuh...tapi mas Gun sukaaaa... karna krupuknya tipis dan crunchy. Aku lebih prefer ketan putih depada item...
Sekarang aku bikin krupuk ga pake resep, main hajar aja... kalo ke enceran ditambahin tapioka. Itu kemaren ga pake Tapioka tapi jadi juga... mana kebanyakan ngasi garem lagi....hehehe
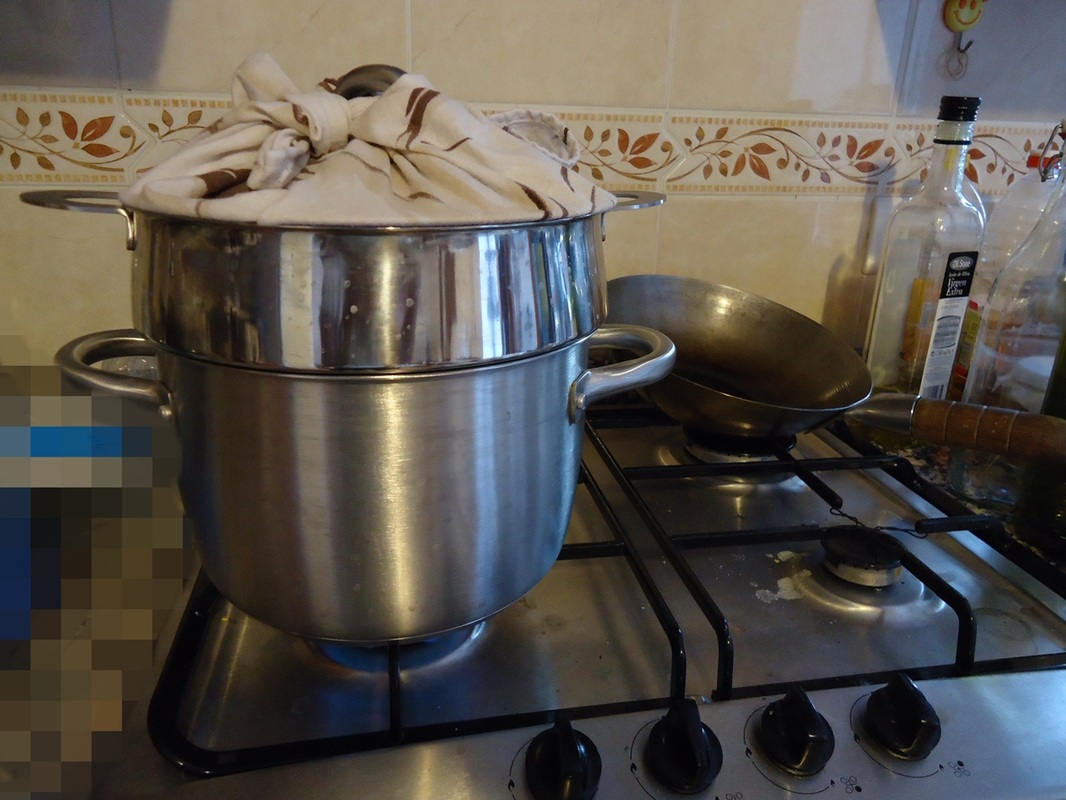
Ini yg kedua kalinya aku ngukus kue selama aku di sini, uda lolos tahap percobaan tempo hari... orang2 dan keluarga Italy pada tercengang cengang ngeliat hasilnya,... kata mereka : kok bisa sih bikin torta pake scola pasta..??!!! hahahahah.... backward bgt deh nih orang2...
Ibu mertua ku aja awal2nya ngetawain, pas aku bilang hari ini bikin kue pake kukusan...
Jadilah ku persembahkan : Brownies kukus!!!
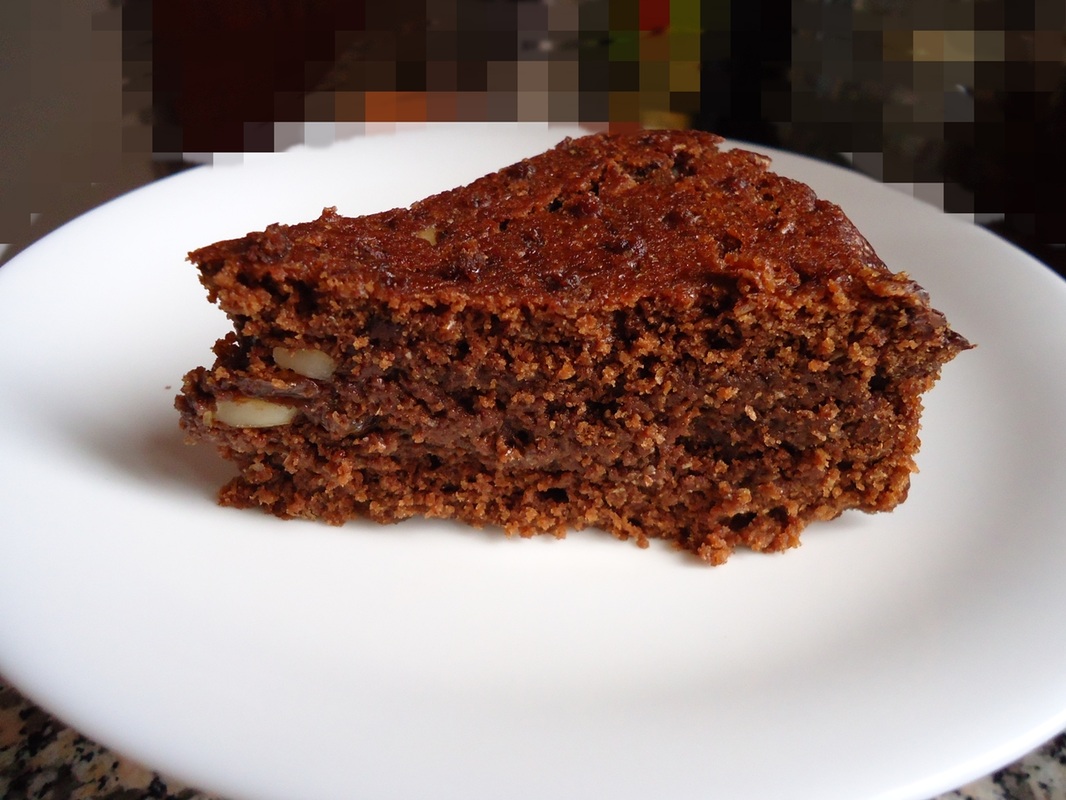 ini yg motong uda keburu laper mata ...pengen disantap aja,, makanya potongannya ga aduhai ^^ Resep yg kupake, resep cemplang cemplung jadi.... hehehe... aku pake Levadura fresca / Lievito di birra.. ga tau nama Indo nya apa... Nah, itu dicairkan pake susu anget suam2 kuku... baru campur ke adonan.
Begitu air kukusan bergolak, baru adonan kumasukin... dikukus selama 30 menit.
Resepnya kira2 begini nih... - dark coklat batangan 150gr dicairkan
- dark coklat batangan 50gr dicacah, jadi total 200gr coklat di dlm satu adonan brownies.
- nuts,... kaya almond gitu deh
- kalo pnya dry fruits jg boleh tuh dicampur.
- telor 1
- minyak goreng 15 sendok makan
- gula 3-4 sendok makan
- baking powder /bicarbonate 1 sendok teh kecil
- garam se uprit
- tepung secukupnya, main kira2 aja... kalo adonanku sampe ga netes...jadi padet... ga cair.
cara membuat :- kocok telor, minyak goreng dan gula sampe kecampur... iya, ga sampe ngembang..coz tanganku uda pegel duluan.
- masukin coklat leleh, aduk
- masukin Lievito yg uda dilelehkan pake susu, aduk
- masukin tepung dikit dikit sampe adonannya sesuai selera, jgn ke enceran...bikin susah naik.
- masukin coklat cacah, nuts,...semuanya deh
- kukus!
HAPPY -KUKUS- COOKING deh kalo gitcuuuuuuuuu
Buat yg expert di dapur, bikin rengginang itu seperti halnya ordinary administration, .. but for me it's a hell of a big deal until today ^^.
Proses pembuatannya ga pake susah, ga pake resep.. cukup beras ketan atau glutinous rice yg dijual di toko cina dan panas utk menjemur. In my case,... aku ada sinar matahari jadi aku jemur2 di teras rumah biar cepet kering gitcuuu...
Recipee shortcut, here's how I made Rengginang : - Beras ketan aku rendam semaleman, 6 jam juga bisa cuma aku males nungguin, so..malemnya direndem...paginya bisa diolah.
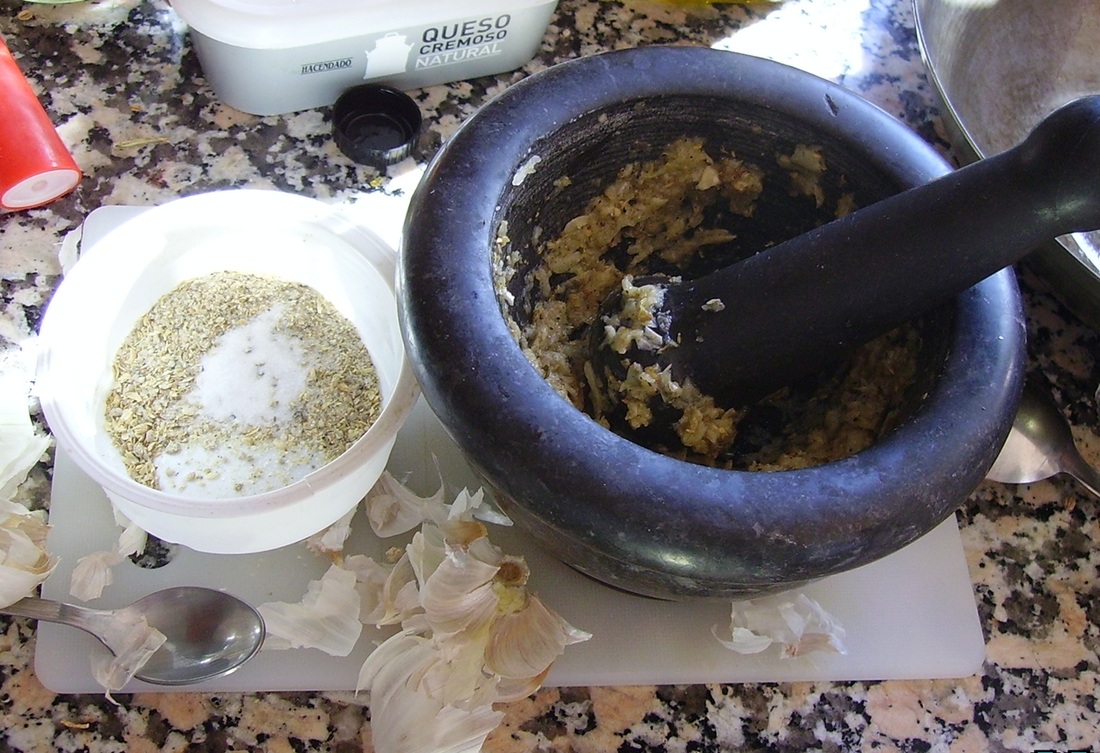
- Garlic, lot's of them biar gurriiihhhhhhhh
- Sebagian orang pake terasi ato udang ebi kering, I skip that... males bau!
- Salt and pepper, I think...
- Beras ketan yg telah direndam, dikukus kurleb 15", campurkan bumbu, kukus lagi 30", cetak dan jemur sampe kerrriiiiinnnnggggg.
- Guess what, aku ga punya kukusan, so aku pake bagno maria pelan2... beras ketan itu cepet matengnya kalo direndem dulu...
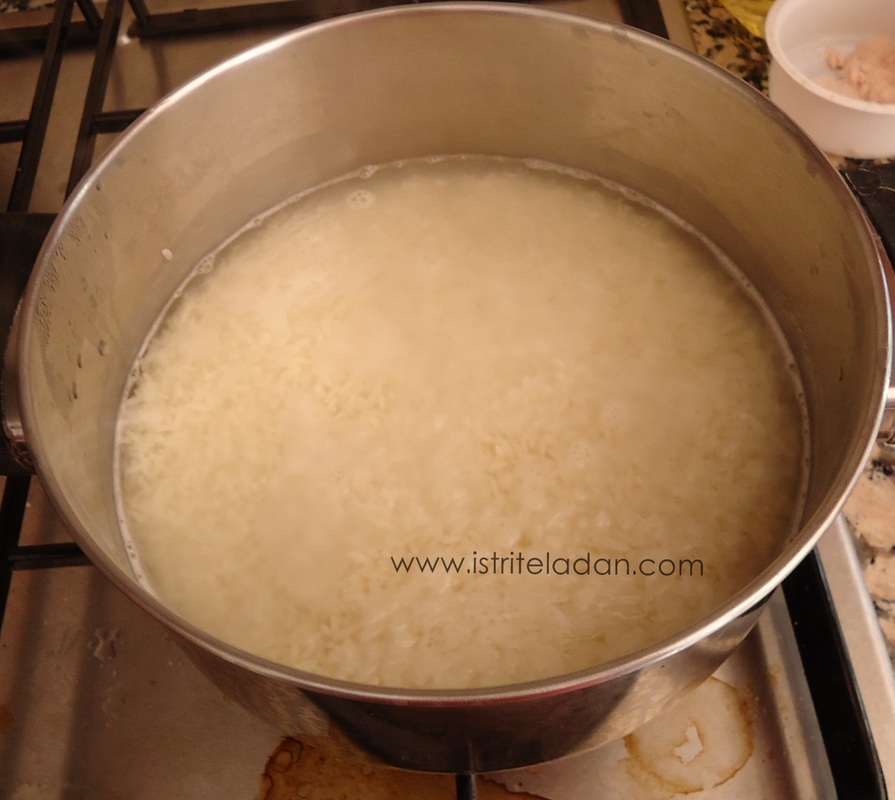
Lihat,.. lihat...beras ketan ku rendemmm
seimbang khan bagno maria ku,... yg besar diatas, yg kecil dibawah.....hehehe
ini proses penjemuran, tanggung jawabnya Mas Gun,,,, ga pake cetakan, cuma ku penyet penyet... langsung jemurrrr
hari ke 2 penjemuran di bawah matahari, 90% kering
siap digoreng!!!

Homemade rengginang!!!!
Karena adonanku ga dikukus, pas jadi... kurang bertekstur kaya rengginang pada umumnya. Lebih ke kerupuk lah...
Mas Gun sukkkaaaaa tuh,... karna dia yg nge jemur, jadi jatahnya dia banyakan....hahahah
Aku personally sih hepi berat dengan hasilnya. Homemade rengginang ini Bebas MSG dan pengawet. So besok2 kalo mudik ke Indo ga usah repot2 bawa kerupuk di koper... bisa bawa yg lainnya gitcuuuuu ^^
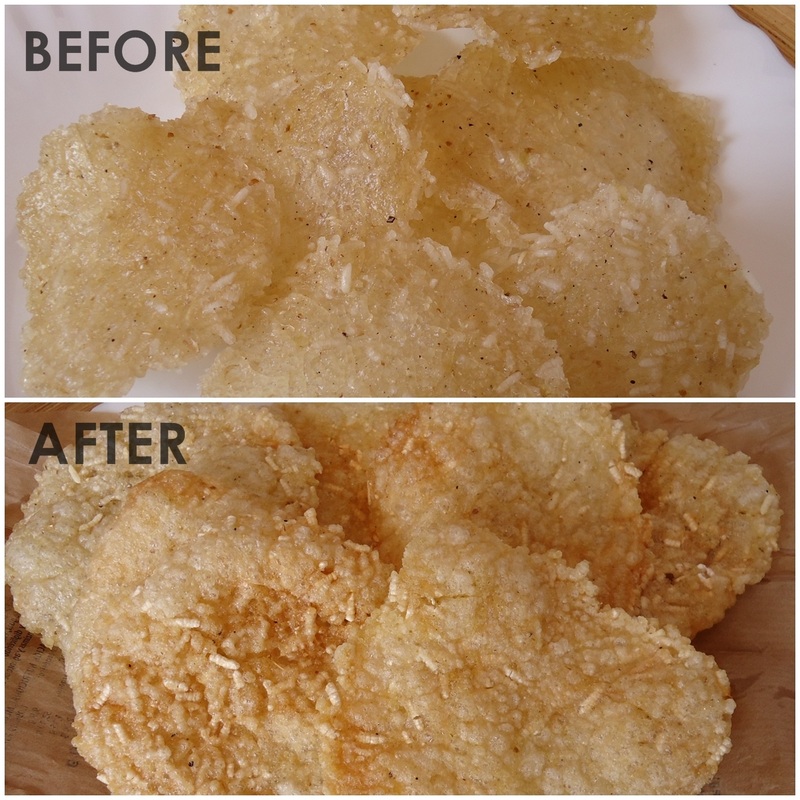
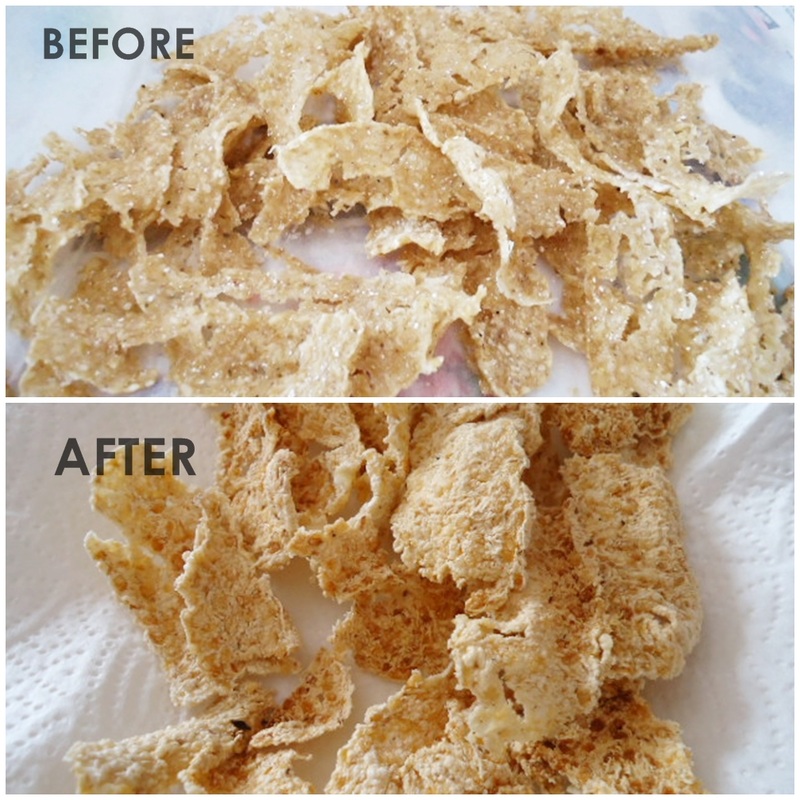
Resep kerupuk gendar/beras yang aku pake kurang jelas penjelasannya, punya ku adonannya kebanyakan air, jadinya lengket... sangat lengket ga bisa dibentuk ato dicetak, yang ada nempel nempel di tangan,....ah..nyebelin! Sebagian saking desperate, aku campurin pake tepung sampe bisa kalis bisa dibentuk... cuma bikin extra work, hasilnya juga ga bagus. Pas digoreng, bukannya jadi kerupuk..malah jadi keripik!! Beda tipis tapi berbeda! Akhirnya adonannya aku simpen di freezer, trus besoknya aku defrost sejam, trus aku potong tipis tipis, texture nya mirip es potong yg dijual zaman SD!, baru deh bisa aku jemur... Pokoknya kalo adonan kalian susah dibentuk atau lengket, JANGAN DICAMPUR TEPUNG TERIGU... tapi di freezer aja dulu.. Step by step nya after trial and error ...gini deh kira kira,... - Beras lembek dihancurkan pake terserah lah...yg penting hancur, jemek gitu lhooo,... aku ngancurinnya pake food processor, biar cepet.
- siapin bumbu, sesuai selera aja ga usah terlalu ngikutin resep lah.
- dicampur sama 8 sdm tapioka yg sudah dilarutkan sama sedikit air.
- dicetak atau di iris tipis.
- dikeringkan dibawah matahari, di dalam rumah juga bisa cuma keringnya berhari hari.
- goreng
Siapin bumbu nya, yaitu: garam 1sdm, ketumbar 1sdm, merica 1sdt, baking powder 1/2 sdt, bawang putih 8 siung yg gede biar gurrihhhh..
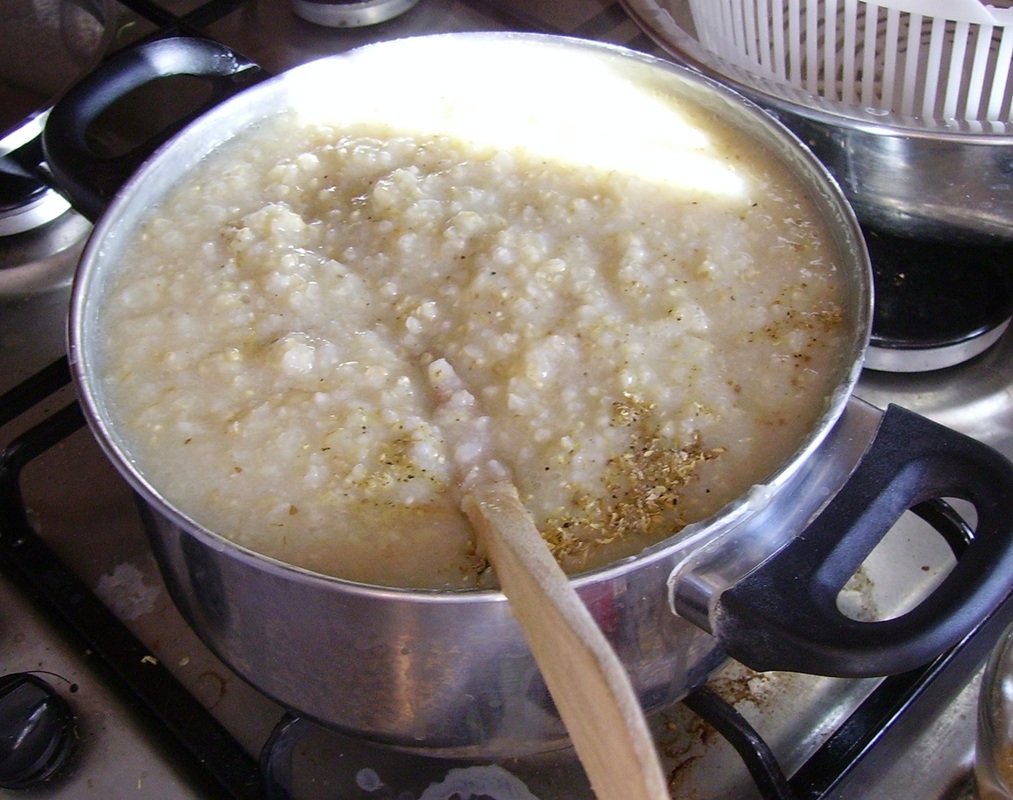
Ketika nasi lembek uda siap, masukin bumbu diatas. Punyaku ini terlalu jadi bubur,,karena kbnyakan air...JANGAN DITIRU!!
Ini food processor punyaku, kalo ga punya... nasi dilembekkan pake ulekan aja...yg penting hancur gitu.
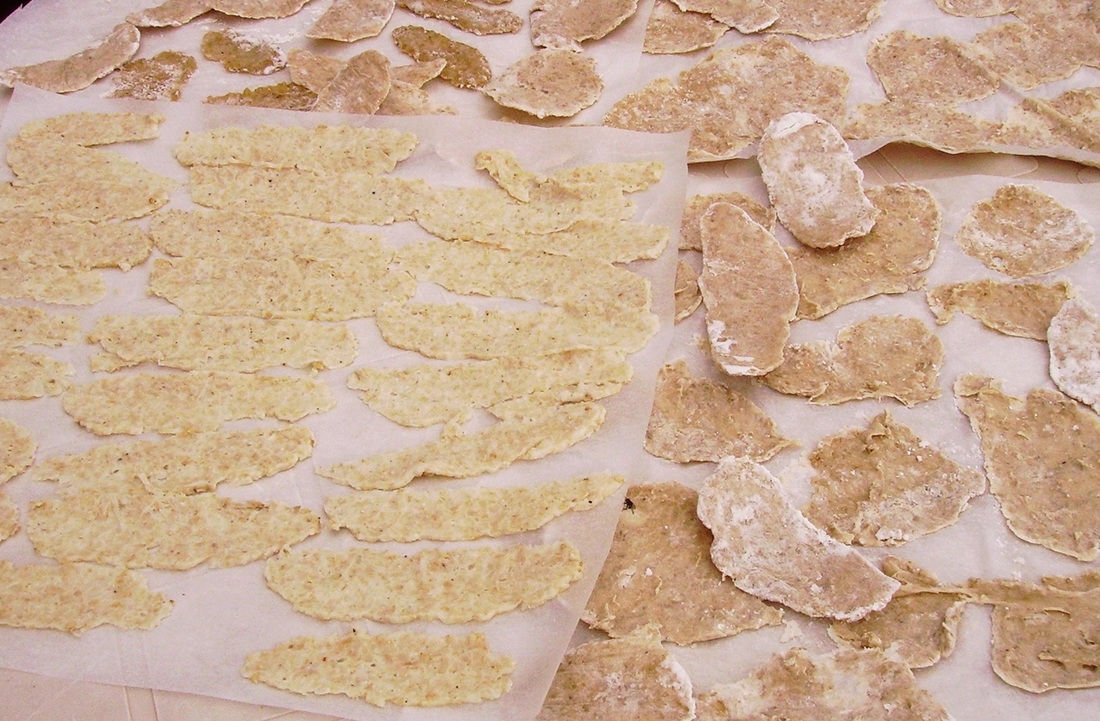
Tahap penjemuran!!! yg sebelah kiri sukses jadi kerupuk crunchy--- yg sebelah kanan jadi keripik!
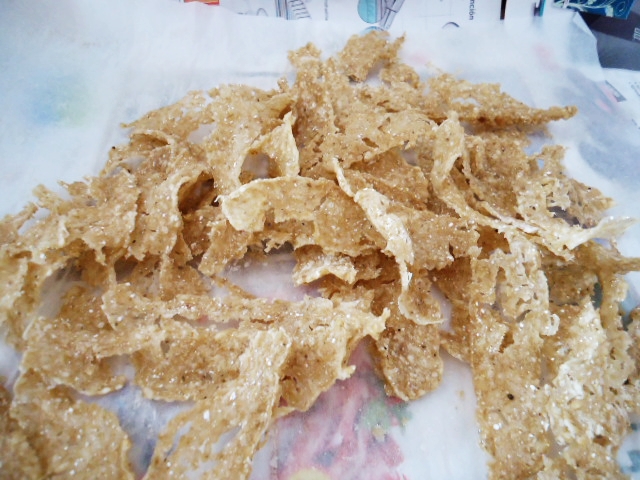
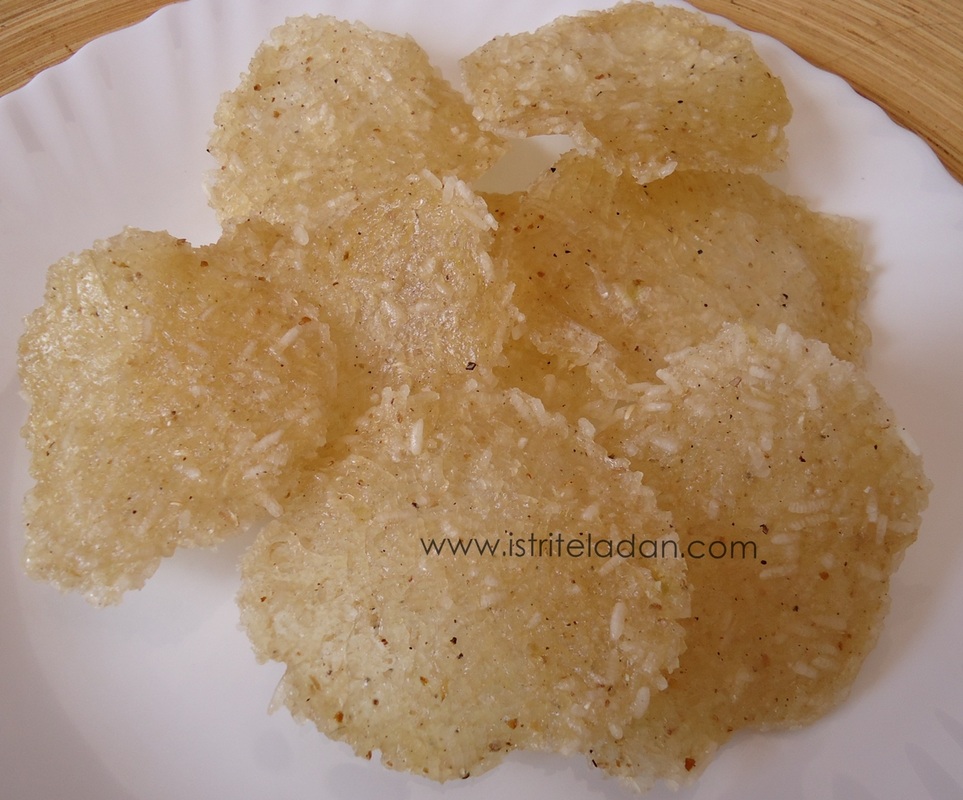
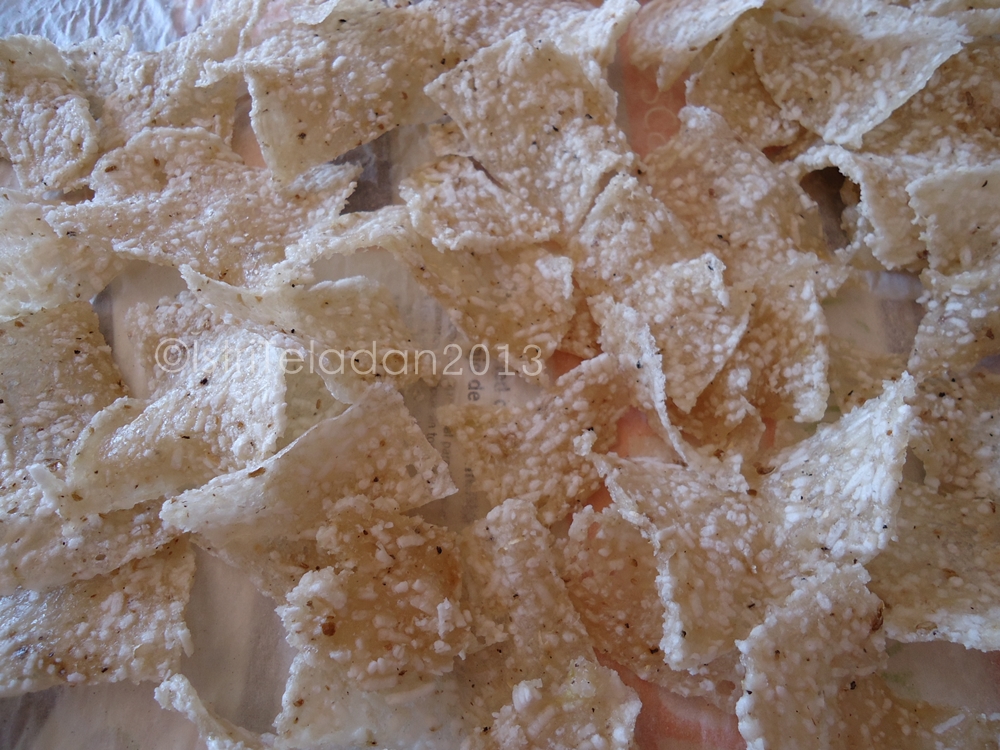
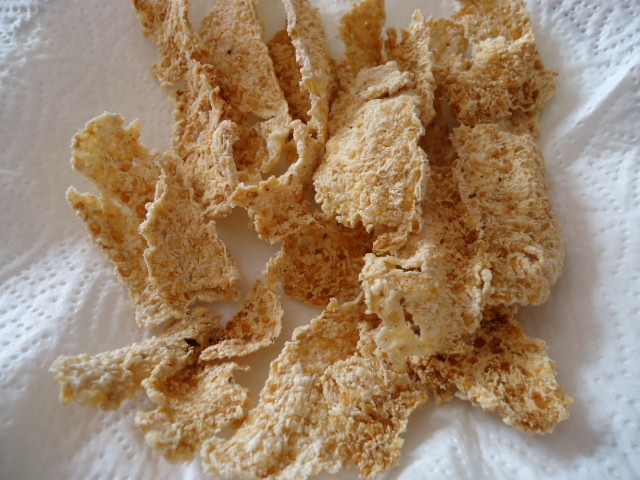
Kerupuk ku uda kering,..kering banget! siap digoreng.
Yah, namanya juga baru tahap percobaan... apalagi yg bikin kaya aku,... jarang ke dapur kalo ga laper...
Tapi kalo buatku ini kerupuk hasilnya not bad lho..., mas Gun aja sukaaaaa..padahal dia ga suka kerupuk, apalagi kerupuk udang,..bau kata dia. Rasa kerupuk homemade ini gurih beras dan kriuk kriuk ....yesss??!!...ga mau beli kerupuk lagi di toko cina, habis mengandung pengawet, MSG dan bahan kimia lainnya yg bikin kanker.
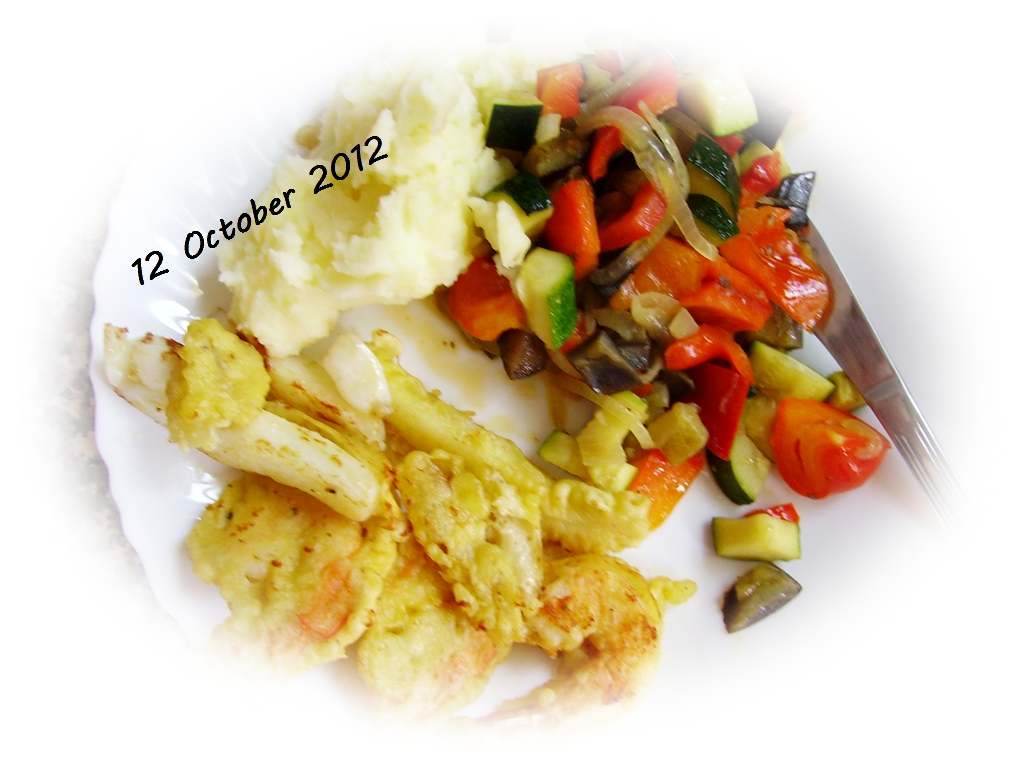
It was our 6th anniversary,... and I accidentaly cook! I made fried prawns and squid with flour, potatoes puree and stir fried veggy. The fried food was delicious,... but honestly, heavy to digest. So,... happy anniversary!
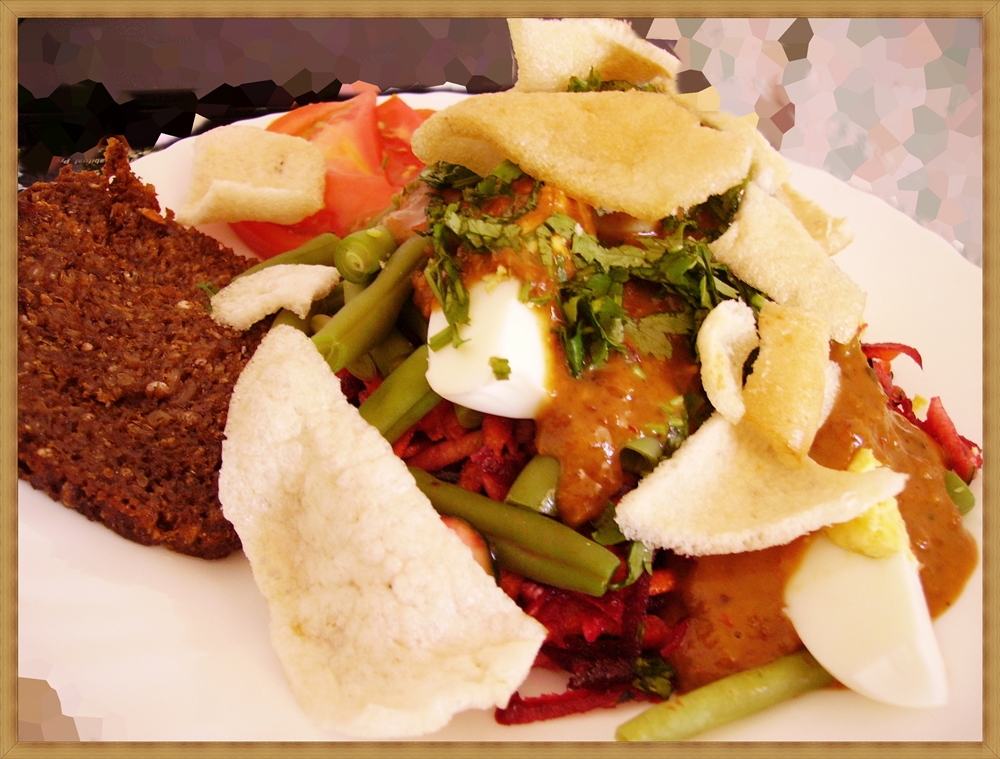
I made this plate after my friend, Cecilia kindly brought me the ready made peanut sauce package . Let see what I add to spicen up this Indonesian home dish....
First of all, I use the ready made peanut sauce, I just add hot water. You can buy this in Asian or International supermarket. But if you really want to make th sauce from scratch then follow this recipe,... it's optional, coz in the end it is up to your preference.Peanut Sauce recipe :- 100 gr peanuts (fried or roasted), crush until powdery.
Blend all these ingredients below and mix it with the blended peanuts.
- 2 garlics
- chilli
- 1tsp salt
- 1tsp roasted shrimp paste (if you like)
- 25gr palm sugar
- 1tsp lime juice
- 100cc water (watch the consistency of the sauce, you like it liquid or a bit dense)
That's for the peanuts sauce, congratulations if you manage to make it from scratch. In my case, I use this list of vegetables below :- fresh carrots, beetrout, tomatoes, and courgette
- boiled beans sprout
- boiled eggs
- fresh coriander
Additional :- shrimp cracker
- pan fried cereal bread from Lidl (when it fried, it can be tempe substitute)
Honestly,... when you live abroad, somehow you manage to be creative in the kitchen once in a while. I'm not good at cooking, it's just accidentaly cook.
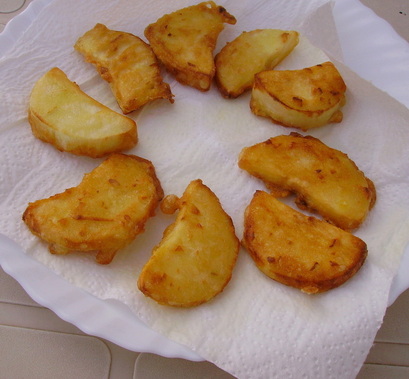
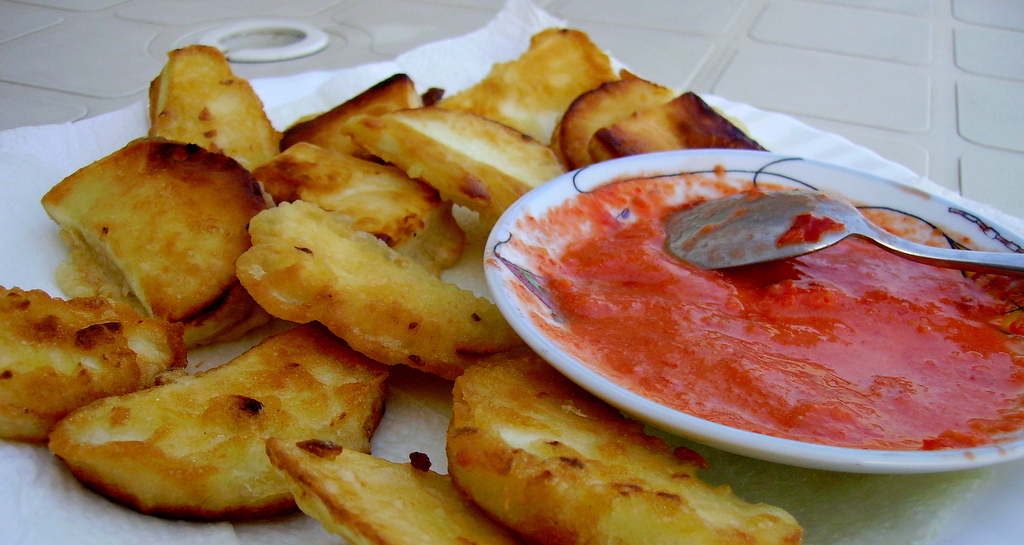
Yucca Root
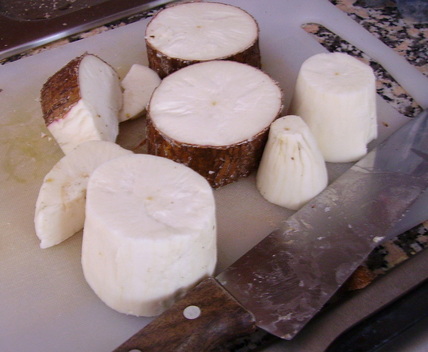
Some people may not know or never taste Yucca Root before. Or even doesn't how to cook Yucca. This time I choose the simple way to .....
cook Yucca. I cut to pieces Yucca Root (prefereable thin), wash it with clean water, sprinkle it with salt. set aside.
Chop one or two garlic (optional, but I think its give more taste). Set aside.
Make mixture of flour and water. Make it in a way that is dense, not to thick neither too liquid (this is just a guide line, in the end it is up to you). Mix it with the chopped garlic.
Prepare the pan, pour the frying oil, I use olive oil. I didn't do deep fried, only stir fried.
Fry the remaining Yucca until golden brown, crunchy outside, tender inside. Delicious! Great for afternoon snack.
When my husband tasted, he asked for the "salsa" (dip) to go with it. I made the dip with onion, fresh tomatoes, salt, a squish of lemon juice and chilly.
IstriTeladan note :
Back home in Indonesia, we call it Singkong or Ubi. Many ways on how to cook it. Relatively cheap to buy, while in Europe would cost 3 euros a kilo, more or less.
|


 RSS Feed